The most important thing to take away from this lesson is..
Cooking can account for as much as 5% to 15% of your total energy budget. It makes excellent sense to reconsider how you cook, and perhaps make small, but necessary changes that can lower your expenses.

We are talking about long-term strategies and results here. There is no need to rush out and buy a new stove. However there is a need to take a look at the way you are doing things to minimize the energy cost now, while educating yourself to future options when the times comes to buy a new stove.
Today’s energy efficient appliances are between 25% TO 65% more energy efficient. If your appliances are more than 10 years old, it’s time to start looking at updating them anyway.
Save Energy, Save Money
When buying an appliance, remember that it has two price tags: what you pay to take it home and what you pay for the energy and water it uses. ENERGY STAR qualified appliances incorporate advanced technologies that use 10–50% less energy and water than standard models. The money you save on your utility bills can more than make up for the cost of a more expensive but more efficient ENERGY STAR model.
Buying New Appliances
When considering new cooking appliances there are several things to take into consideration.
Range, or Cook top and Oven?
No difference in terms of energy use whether you prefer to have your cook top separate from your oven or combined in one unit.
With conventional gas or electric ovens, simply because they have more insulation. But if you use the self-cleaning feature more than about once a month, you’ll end up using more energy with the feature than you save from the extra insulation.
Gas or Electric?
As a general rule, Gas is usually preferable to electricity as a cooking fuel. But because cooking doesn't make a huge overall impact on your energy bill, this choice has more to do with your own feeling in the matter. Many people feel that gas offers better cooking control; but, it also creates another problem…creating combustion products into the house that now must be vented to the outside. If you’re going to vent to the outside, be aware of air leakage. Think about purchasing an energy-efficient range hood that vents cooking products up from the cook top and directly outside (avoid down-draft vents).
Which Type of Gas Element?
There are three types of gas burners available: conventional burners with standing pilots, conventional burners with electric ignition (the most common), Sealed burners, where the burner is fused to the cook top.
Standing pilots can more than double the annual energy consumption of your cook top or range and should be avoided whenever possible. When comparing sealed to unsealed burners, there is no measurable difference in cooking efficiency, however, sealed burners are simpler and easier to clean.
Which Electric Element?
With electric cooktops, a number of different burner types are available, in order of increasing efficiency (and cost): solid disk, exposed coil (the most common type),radiant, halogen, or induction elements.

Unless you do a lot of cooking, it is probably hard to justify the fancier cook top technologies on energy savings basis alone. It would probably be more cost-effective to stick with an electric coil or radiant element and consider putting your money into better cookware.
Conventional or Convection Oven?
Convection ovens are generally more energy efficient than conventional ovens. This is because the heated air is circulated around the food being cooked, therefore reducing required temperature and cooking times. On average, you’ll cut energy use by about 20%.
Self-Cleaning or Standard Oven?
self-cleaning models are more energy-efficientWhat Kind of Microwave?
On this subject, the debate rages non-stop. Microwaves use a lot of energy when operating, but because cooking times are so drastically reduced, using a microwave to prepare a meal will reduce energy use by about two-thirds compared to a conventional oven.
Because less heat is generated in the kitchen, you may also save on air conditioning costs during the summer. Some microwave ovens include sophisticated features to further boost energy efficiency and cooking performance, such as temperature probes, controls to turn off the microwave when food is cooked, and variable power settings.
New “rapid-cook” ovens combining microwaves with other cooking technologies— notably halogen lights or convection—are designed to cut cooking time and improve the quality of foods compared to standard microwave preparation.
What You Can Do Starting Today
Reduce the time it takes to Cook...Before you begin…
- Defrost frozen foods in the refrigerator before cooking.
- Don’t “defrost” in the oven.
- When using conventional ovens, keep preheat time to 5 minutes or less. When you’re cooking…
- keep the oven racks clear and open.
- Don’t lay foil on the racks
- Stagger more than one pan to improve air flow.
- Avoid looking into the oven as you cook.
- Don’t overcook. When using an electric burner or oven, turn off the heat just before the cooking is completed to prevent overcooking.Next time…
- Cook double portions then all you have to do is reheat prepared food.
- Also, use the self-cleaning option in your oven no more than once a month or less
- And only after you’ve cooked a meal so it can use the residual heat.
Match the Cooking Method to the Meal
Methods of cooking that minimize the area the must be heated (a toaster oven versus an oven, for example) save energy. On the other hand, sometimes the most efficient cooking methods (like the microwave) will sacrifice food quality. The trick is to find the right balance, or an appliance explicitly designed for a particular type of meal (crockpot, rice-cooker, etc)
Match the Pan Size to the Element Size
For example, when using an electric cooktop, a 6" pan on an 8" burner will waste over 40% of the heat produced by the burner.
Buy Sturdy, Flat-Bottomed Cookware
The ideal pan has a slightly concave bottom — when it heats up, the metal expands and the bottom flattens out. An electric element is significantly less efficient if the pan does not have good contact with the element. For example, boiling water for pasta could use 50% more energy on a cheap, warped-bottom pan compared to a flat-bottom pan.
Use High-Conductivity Materials
Certain materials also work better than others and usually result in more evenly cooked food. For instance, copper-bottom pans heat up faster than regular pans. In the oven, glass or ceramic pans are typically better than metal—you can turn down the temperature about 25°F and cook foods just as quickly.
Keep Your Stovetop Clean
Believe it or not, when burner pans become blackened from heavy use, they can absorb a lot of heat, reducing burner efficiency. You want them to remain shiny so they reflect heat up to the cookware.
The Minimum Necessary to Eat Like a King and Bring Your Cooking Expenses Down to Pennies a Day
Let's say you want to eat well but still use the minimum amount of energy to do so. You're in luck because it is not only possible but you'll be hard pressed to tell the difference from cooking in these 2 tools and a well equipped kitchen. There is literally nothing you can't cook, except maybe a 25 pound turkey.
Here's the Tools You'll Need

Ninja Instant, 1000-Watt Pressure, Slow, Multi Cooker, 5 built-in cooking functions: pressure cook (High and low), slow cook, steam, sear/sauté, and keep Warm. Seriously, this puppy can do just about everything a stove top cooker can and more. I use mine mostly for sauces, stews, and slow and/or pressure cooking. But what comes in handy is you can also saute and/or sear meats in it as well. No need for 2 different pans. And it is only $65.

Ninja SP101 Foodi 8-in-1 Air Fry Large Toaster Oven Flip-Away for Storage Dehydrator This unit can do just about anything a regular oven can do and more. You can't bake a 25 pound turkey in it, but that is about all it can't do. Only $169
Those two pieces of cookware are about all you need to cook inexpensively, with the lowest possible energy usage while still maintaining gourmet quality food. No joke.
For $234 you don't even need a kitchen! Did mention that both units come with their own high quality cookbooks? You can't go wrong.
By the way, these are also great to send to college with your kids.
How To Cook In a Natural Disaster
While this isn’t something you’d probably want to do on a daily basis, for emergencies nothing beats this method. It’s simple, it’s cheap, and can be made with the materials around you.
This simple box cooker that can be built in a few hours for very little money.
Don’t think for a minute this is some “cheap substitute.” It’s not. Be careful when using it because the heat generated will be every bit as hot as your cook range.
What You’ll Need:
- Two cardboard boxes. We would suggest that you use an inner box that is at least 15 inch x 15 inch (38 cm x 38 cm), but bigger is better. The outer box should be larger all around, but it doesn't matter how much bigger, as long as there is a half inch (1.5cm) or more of an airspace between the two boxes. The distance between the two boxes does not have to be equal all the way around. Also, keep in mind that it is very easy to adjust the size of a cardboard box by cutting and gluing it.
- One sheet of cardboard to make the lid. This piece must be approximately 2 to 3 inch (4 to 8 cm) larger all the way around than the top of the finished cooker (the outer box).
- One small roll of aluminum foil.
- One can of flat-black spray paint (look for the words "non-toxic when dry") or one small jar of black tempera paint. Some people have reported making their own paint out of soot mixed with wheat paste.
- At least 8 ounces (250 g) of white glue or wheat paste.
- One Reynolds Oven Cooking Bag®. These are available in almost all supermarkets in the U.S They are rated for 400 °F (204 °C) so they are perfect for solar cooking. They are not UV-resistant; thus they will become more brittle and opaque over time and may need to be replaced periodically.
- A sheet of glass can also be used, but this is more expensive and fragile, and doesn't offer that much better cooking except on windy days.
What you’re going to do:
Fold the top flaps closed on the outer box and set the inner box on top and trace a line around it onto the top of the outer box, Remove the inner box and cut along this line to form a hole in the top of the outer box (Figure 1).

Decide how deep you want your oven to be. It should be about 1 inch (2.5 cm) deeper than your largest pot and about 1" shorter than the outer box so that there will be a space between the bottoms of the boxes once the cooker is assembled. Using a knife, slit the corners of the inner box down to that height. Fold each side down forming extended flaps (Figure 2). Folding is smoother if you first draw a firm line from the end of one cut to the other where the folds are to go.

Glue aluminum foil to the inside of both boxes and also to the inside of the remaining top flaps of the outer box. Don't bother being neat on the outer box, since it will never be seen, nor will it experience any wear. The inner box will be visible even after assembly, so if it matters to you, you might want to take more time here. Glue the top flaps closed on the outer box.
Place some wads of crumpled newspaper into the outer box so that when you set the inner box down inside the hole in the outer box, the flaps on the inner box just touch the top of the outer box (Figure 3). Glue these flaps onto the top of the outer box. Trim the excess flap length to be even with the perimeter of the outer box.

Finally, to make the drip pan, cut a piece of cardboard, the same size as the bottom of the interior of the oven and apply foil to one side. Paint this foiled side black and allow it to dry. Put this in the oven so that it rests on the bottom of the inner box (black side up), and place your pots on it when cooking. The base is now finished.
Building the Removable Lid
Take the large sheet of cardboard and lay it on top of the base. Trace its outline and then cut and fold down the edges to form a lip of about 3" (7.5cm). Fold the corner flaps around and glue to the side lid flaps. (Figure 4). Orient the corrugations so that they go from left to right as you face the oven so that later the prop may be inserted into the corrugations (Figure 6). One trick you can use to make the lid fit well is to lay the pencil or pen against the side of the box when marking (Figure 5). Don't glue this lid to the box; you'll need to remove it to move pots in and out of the oven.


Improving Efficiency
The oven you have built should cook fine during most of the solar season. If you would like to improve the efficiency to be able to cook on more marginal days, you can modify your oven in any or all of the following ways:
Make pieces of foiled cardboard the same size as the oven sides and place these in the wall spaces.
Make a new reflector the size of the entire lid (see figure 6 above).
Make the drip pan using sheet metal, such as aluminum flashing. Paint this black and elevate this off the bottom of the oven slightly with small cardboard strips.
Adding a Propane Stove
A small, one burner or two burner propane stove can add the ability to cook a feast. These are great emergency equipment which can do double duty by also providing a heat source if necessary.
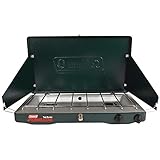
The use of propane is easy and quick. A small propane stove could be purchased and then stored until the need for use. Propane is clean and produces good heat for cooking and canning. The downside of a stove/oven would be the amount used. Either multiple bottles or a large tank would be needed to keep operating it during a SHTF scenario.
And of course, your propane barbecue can also be put to good use during an emergency. Between these 3 tools you can cook soups, stews, breads, pies, and barbecue meats. They have the added ability of being able to supply heat.
However, you do use propane indoors make sure your stove is cook-safe indoors. Also never use wood, charcoal or kerosene indoors.
What You Can Do Starting Today
1) Get started immediately examining your cooking lifestyle. Look at the way you cook as well as the time you spend cooking. Making a few simple changes can result in big savings without sacrificing any comfort or taste.
2) Begin thinking about replacing your stove and/or range: Eventually you have to anyway. Now is a good time to do prep work for the future. Know exactly what you’ll buy, and more importantly, why is it a good deal and a good fit for your family.
3.) Try experimenting with solar cookers. This is a valuable skill to know in emergency situations. Build a solar cooker and store it “just in case.”
PS…Don’t forget you can get personalized coaching at Off-Grid-Living.com/ For some this is the ideal way to get hands on experience as well as personal attention needed to make this work for you.
Coming Up Next ...
Lesson #11: “Doing Laundry the Energy efficient Way ”
In the next lesson we’ll be covering different methods of doing laundry and how to save money on this energy intensive chore.
Included are money saving tips on how to make your own laundry detergent and save even more money. Stay tuned.