Aeroponics Systems: What You Need to Know
With a substantial amount of the world's farmland diminishing and food shortages affecting countries worldwide, innovative farming methods such as hydroponics and aeroponics systems enable crops to be produced in places that cannot be produced in traditional farming. As the popularity of these alternative farming methods grows, more misconceptions about the design, environmental impact, and overall health of plants cultivated in aeroponics and hydroponics emerge.
Aeroponics vs. Hydroponics
Many people confuse farming using aeroponics systems with hydroponics, which is another type of farming that has grown in popularity in recent years. While both approaches do not require soil, the way nutrients are given to plants is vastly different.
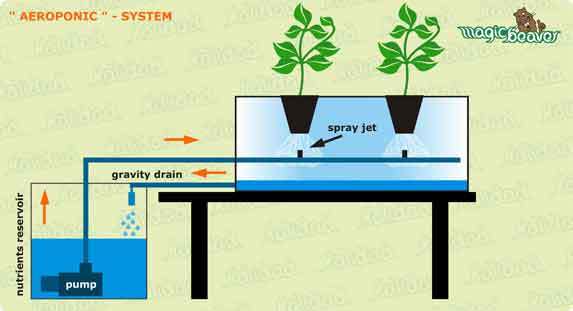
Aeroponics vs. hydroponics: plants in hydroponics can be suspended in water all the time or supplied by an intermittent flow of water. Aeroponic plants are never immersed in water and instead receive nutrients from a mist sprayed onto their roots.
This crucial distinction is what gives each approach its distinct moniker. Aeroponics is derived from the Greek words aero, which means air, and ponos, which means effort. Hydroponics, on the other hand, is derived from the Greek phrase hydro, which means "water," and is translated as "working water"!
Aeroponics System Plans
As mentioned, aeroponics, which means "working air," is derived from the Greek words for air (aer) and labor (ponos). This type of hydroponics involves growing plants without the use of soil. Instead, it uses air to deliver a nutrient-rich mist to the roots of the plant.
While the plant's physical growth process is similar to that of other forms of farming or hydroponics, aeroponics system plans differ in how nutrients and environmental conditions are provided and managed. Aeroponics is performed in a closed environment in which the grower controls all components of the system with the purpose of assisting plants in growing healthier.
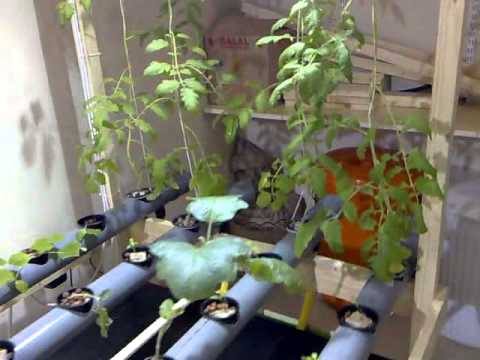
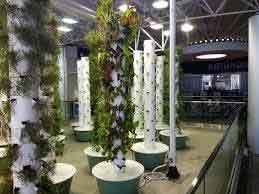
Large vertical grow racks hold the plants. Nitrogen, phosphorous, and potassium are essential organic liquid nutrients provided to a big water reservoir. These organic nutrients in their purest form are more easily digested by plants, resulting in faster and easier uptake. This nutrient-rich mist is supplied straight to the root zone, eliminating the need for plants to search for food.
Indoor grow lights are designed to emit specific wavelengths in order to encourage plant growth. The total enclosure is kept within particular temperature and humidity restrictions. This technique maximizes nutrient absorption while putting less strain on the plant, resulting in healthier product overall. Aeroponic plants have more nutritional content while also having superior color, texture, and taste.
Why Aeroponics Systems?
Aeroponics system plans solve contemporary farming concerns by providing an alternative method of producing greens and vegetables. Among the system's many advantages are:
There is 98% less land. Aeroponics consumes 98% less land than traditional farming methods due to the system's usage of vertical, as well as horizontal space.
Production occurs all year. Aeroponics is part of a practice group called "Soilless Controlled Environment Agriculture" (or CEA). This umbrella phrase refers to all methods of indoor plant production in which the grower controls environmental factors such as temperature and sunshine. Growing in a controlled setting increases a farm's capacity to predict harvest timing, cultivate high-quality plants, and meet food safety standards.
There is 95% less water. A regulated environment has much less unpredictability, resulting in less waste and reduced costs. Although aeroponics systems require water-based solutions to function efficiently, they consume around 95% less water than conventional farming.
More effective. Growers organize their systems and nutrition solutions to enhance plant growth and yield. Plants nurtured in these indoor gardens have been shown to grow up to three times quicker than those grown in outdoor farms.
Consumers are safer as a result. A closed environment reduces the possibility of soil contamination or cross-contamination with Mother Nature, resulting in more organic products.
DIY Aeroponics System
A simple aeroponics systems DIY hobbyists will love is the single bucket homemade aeroponics system. While small-scale farmers may opt for multi-bucket systems, this article will only discuss the single-bucket system. You can find more advanced DIY systems online, but for beginners, this is the best plan to start with.
Here’s how to build your DIY aeroponics system.
What You’ll Need
1 big-sized plastic planter, or pot w/o holes
1 3’ to 7’ long garden hose
1 water pump (for aquarium use)
1 “T” hose
1 outlet timer for the pump
1 bag of clay pebbles
Time required to complete the homemade aeroponics system is around half an hour for one plant, for which you’ll spend around $70.00.
Instructions
Cut the garden hose into 2 pieces, 1 for the filter and the other for the “circle” dripper. Drill small hoses at the pot’s bottom, and a large hole to accommodate the hose.
Place the garden hose for the pump in the big hole. Use the other piece of the hose to connect the 2 ends to the “T” fitting. You can replace the hose with any kind of rubber tube if preferred.
Drill 30 small holes on the “circle” hose; prevent water drip down.
Avoid drilling too big holes as you need to evenly disperse the water around the circle. Just drill one hole at the bottom where the pump cord can exit, when necessary.
Connect one of the hose ends to the pump outlet, then fill the bottom part of the planter with enough water. Set up the pump inside. Drop the hose into the flower pot, then feed it up and through. Then, connect it to the circular water dripper. Make sure that the pump stays at the bottom part of the large planter. It must have water at the bottom.
Get the clay pebbles and pour them into the flower pot. Gently put down your seedlings in the hydro balls. Once you are done with everything, try turning the pump on. Check how the water drips from the hose. Allow water to drip so your crops can grow. Plug the aquarium pump to an outlet timer. Set the timer as you deem necessary.

