If you’re looking to save money on your energy bills and reduce your carbon footprint, then a DIY solar heating system could be the perfect solution for you.
As an expert in the field of sustainable energy, I believe that everyone should have access to affordable and eco-friendly heating options.
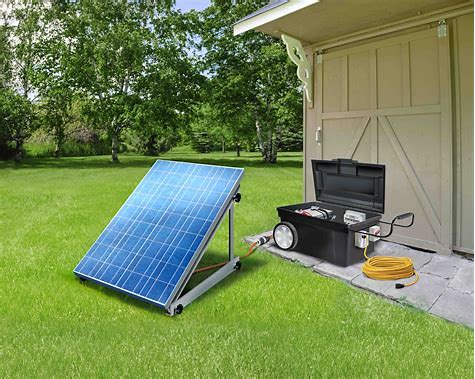
A DIY solar heating system is a simple yet effective way to harness the power of the sun’s rays and turn them into heat for your home.
With just a few basic tools and some readily available materials, you can create a solar collector that will absorb sunlight during the day and release it as warm air into your living space at night.
Whether you live in a sunny climate or not, a DIY solar heating system can help you cut down on your reliance on fossil fuels while providing comfortable warmth throughout the colder months of the year.
So why wait? Let’s dive into the details of how to build your own cost-effective and sustainable solar heating system!
Understanding Solar Energy
Before diving into the intricacies of designing a DIY solar heating system, it’s important to have a fundamental understanding of solar energy itself.
Solar energy is harnessed from the sun and can be converted into electricity or heat through various technologies.
The amount of energy received by the Earth from the sun in just one hour is enough to power all human activities for an entire year!
Solar panels are commonly used to generate electricity, but they can also be utilized for thermal applications such as heating water or air.
This type of technology is known as solar thermal or solar heating.
By absorbing sunlight and converting it into heat, these systems offer a sustainable alternative to traditional fossil fuel-based heating methods.
With proper design and installation, a DIY solar heating system can provide significant savings on monthly utility bills while reducing carbon emissions at the same time.
Now let’s move onto designing your own solar heating system!
Designing Your Solar Heating System
When it comes to designing your own solar heating system, an important step is choosing the right components.
Once you have that sorted, then you can think about where to place your system for optimal results.
Choosing Components
If you’re considering designing your own solar heating system, choosing the right components is crucial.
As an expert in this field, I recommend starting with high-quality solar panels that can withstand extreme weather conditions and produce enough energy to power your system effectively.
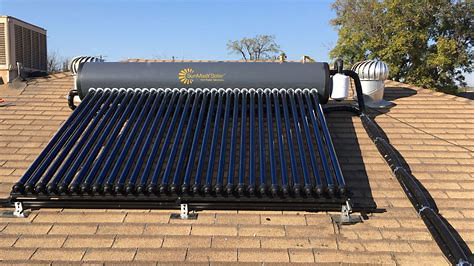
You’ll also need a reliable pump to circulate water or another heat transfer fluid through the panels and into your home’s heating system.
Additionally, it’s important to select durable piping that won’t corrode over time and high-efficiency storage tanks that can hold enough hot water for your household’s needs.
By carefully selecting each component of your DIY solar heating system, you’ll be well on your way to enjoying cost-effective and eco-friendly warmth throughout the year.
System Placement
Now that you’ve got the right components for your solar heating system, it’s time to think about where to place them.
System placement is a critical aspect of designing an efficient and effective solar heating system.
Ideally, you want to install your panels in an unobstructed area with maximum exposure to sunlight throughout the day.
This could be on a south-facing roof or mounted on a structure like a pergola or ground-mounted rack.
It’s also important to consider factors such as shading from trees or buildings and seasonal changes in sun angle when deciding on the best location for your system.
Proper positioning can maximize energy production and ensure optimal performance year-round.
Building Your Solar Collector
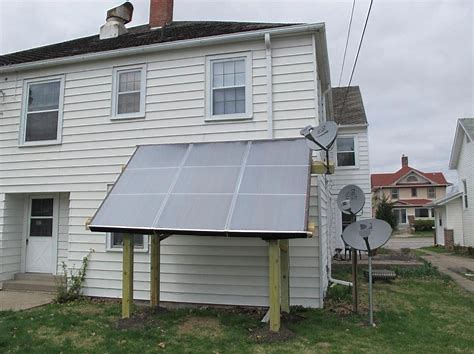
Now that you have designed your solar heating system, it’s time to move onto the next step: building your solar collector. This is a crucial part of the process as it will be responsible for capturing and converting sunlight into usable heat.
Firstly, determine where you want to place your solar collector. It should ideally receive maximum sunlight throughout the day, so consider factors such as shading from trees and other buildings.
Once you’ve found the perfect spot, begin constructing your frame using sturdy materials such as wood or metal. Next, install insulation on the back of the frame to prevent any heat loss through conduction. Finally, attach the absorbent surface (usually made of copper tubing) onto the front of the frame and connect it to piping that leads back to your storage tank.
With these steps completed, your solar collector is ready to start harnessing energy from the sun!
- Use high-quality insulating material
- Consider installing a tracking mechanism for optimal efficiency
- Regularly clean debris off absorber surface
As an expert in solar heating systems, I know how important it is to properly build and maintain each component of your system. By following these guidelines and taking care of your solar collector, you can ensure that it works efficiently for years to come.
However, even with proper maintenance issues may arise which require troubleshooting skills. In our next section we’ll explore common problems that arise when maintaining a DIY Solar Heating System and tips on how best solve them.
Maintaining And Troubleshooting Your System
Oh, congratulations! You have successfully installed your very own solar heating system. Now that you are enjoying its benefits, it’s time to think about maintaining and troubleshooting the system. Yes, I know this is not as exciting as installing a new gadget or appliance in your home, but trust me, it will save you from headaches and expenses down the road.
First things first – check your panels regularly for dirt and debris. Dust accumulation can decrease efficiency by up to 30%. Clean the panels with water and soap once every three months if possible.
Next, keep an eye on fluid leaks or drops in performance. If you notice anything unusual, call a professional right away because small issues can turn into major problems quickly. In addition, you should also monitor the temperature of both incoming and outgoing fluids daily so that any changes can be detected early on.
Remember these simple tips to make sure your DIY solar heating system stays efficient all year round!
Now that we’ve covered maintenance let’s talk about some common problems people encounter while using their solar heating systems. One issue is air pockets forming inside the pipes due to improper installation or lack of maintenance which reduces heat transfer efficiency significantly.
Another problem could be blockages caused by mineral buildup or corrosion over time; again leading to poor performance levels.
Lastly, faulty pumps or controllers may cause inconsistencies in temperature readings resulting in ineffective operation overall. Don’t worry though: most of these problems can be easily resolved through regular inspections from professionals who specialize in repairing such systems – just remember to act fast before they become bigger complications!
Conclusion
So, there you have it – your very own DIY solar heating system! By harnessing the power of the sun, not only are you saving money on energy bills but also doing your bit for the environment.
Imagine soaking up that warm sunshine as it heats your home in a sustainable way – it’s like having your very own personal sunshine!
As a solar heating system expert, I can assure you that with proper maintenance and troubleshooting, this system will provide efficient heating for years to come.
So why not take the leap and build one yourself? You’ll be amazed by how easy and cost-effective it is to implement renewable energy into your everyday life.
Let’s all do our part in creating a brighter, greener future!
