Solar DIY Projects: Fun and Creative Solar DIY Projects to Power Up Your Life. As we move towards a more sustainable future, many people are looking for ways to reduce their carbon footprint and decrease their reliance on traditional energy sources.
One way to do this is by harnessing the power of the sun through solar diy projects.
With the increasing accessibility of affordable solar panels and equipment, it has never been easier for homeowners and DIY enthusiasts alike to embark on their own solar-powered projects.
From simple outdoor lighting setups to full-scale home energy systems, there are countless possibilities when it comes to incorporating solar technology into your life.
In this article, we will explore some creative and practical ideas for solar diy projects that can help you save money while reducing your impact on the environment.
Solar-Powered Outdoor Lighting
Looking to add some eco-friendly lighting to your outdoor space? Solar-powered outdoor lighting might be just what you need!
With a few simple materials and tools, you can create beautiful outdoor lights that require no electricity and rely solely on the power of the sun. To make solar-powered outdoor lighting, you’ll need solar panels or modules, rechargeable batteries, LED bulbs, wires, and a charger controller.
First, connect the solar panels to the charge controller by following the instructions included with your panel kit. Then, attach the battery to the charge controller using wires. Once everything is connected correctly, it’s time to install your LED bulb(s) into your chosen lighting fixture(s).
Be sure to test each component individually before installing them together in order to avoid any issues down the road. Finally, mount your newly constructed light fixtures onto sturdy posts or walls outside for all-night illumination!
Building Your Own Solar Water Heater
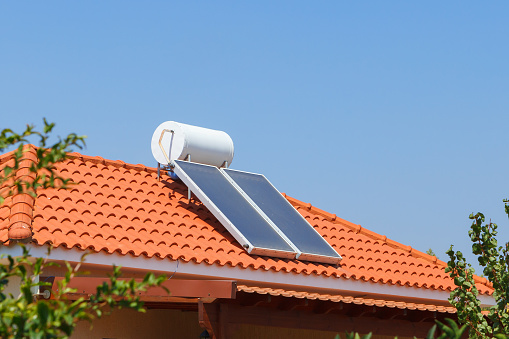
Gathering supplies for your solar water heater is key; you’ll need to make sure you have everything you need before you get started.
Planning out the design is the next step: decide which parts you’ll need, where they’ll go and how they’ll fit together.
Finally, installing the system is the last step; it’s important to make sure everything is connected properly for the heater to work.
Gathering Supplies
Are you ready to take on the challenge of building your own solar water heater?
The first step is gathering all the necessary supplies. Don’t worry, it’s not as daunting as it may seem. Many of the materials can be found at a local hardware store or online, and some may even be laying around your garage already.
You’ll need copper tubing, plywood or insulation board for the box, Plexiglas or glass for the cover, black paint, black foam pipe insulation, and plumbing fittings such as T-connectors and valves.
Make sure to double-check your list before starting the project so that you have everything you need.
With these supplies in hand, you’ll be well on your way to creating an eco-friendly source of hot water in no time!
Planning The Design
Now that you have all the necessary supplies, it’s time to start planning the design of your solar water heater.
The first step is deciding on the size and shape of your box. You want to make sure it’s big enough to hold your copper tubing but not so large that it becomes cumbersome. Consider where you’ll be placing the box and how much space you have available.
Next, think about the angle at which your solar panel will be placed. Ideally, it should face south if you’re in the northern hemisphere or north if you’re in the southern hemisphere. This will ensure maximum sunlight exposure throughout the day.
You also need to plan for insulation. Your box needs to be well-insulated to retain heat, especially during colder months. Plywood or insulation board are good choices for this purpose.
Lastly, consider how you’ll connect everything together – from the copper tubing to plumbing fittings such as T-connectors and valves. Ensure everything fits snugly together and there are no leaks.
With these design considerations in mind, you can move onto building your own solar water heater!
Installing The System
Now that your solar water heater is designed and built, it’s time to move onto the installation process.
You’ll need to carefully choose a spot for your solar panel where it will receive maximum sunlight exposure throughout the day.
It’s important to ensure that the angle of the panel is optimized for sun exposure as well.
Once you’ve found a good location, install your solar panel securely using brackets or other mounting hardware.
Next, connect your copper tubing to plumbing fittings such as T-connectors and valves, ensuring a tight fit with no leaks.
Finally, attach your insulated box containing the copper tubing to the solar panel so that heated water can flow from one end of the system to the other.
With these steps completed, you’re ready to start enjoying free hot water from your very own DIY solar water heater!
DIY Solar-Powered Charging Stations
So, you want to build a solar-powered charging station? Well, buckle up because this project is not for the faint of heart. Sure, it sounds simple enough in theory – just hook up some solar panels to a battery and plug in your devices. But trust me when I say that there are plenty of potential pitfalls along the way.
First off, let’s talk about location. Your charging station needs to be placed somewhere with optimal sunlight exposure throughout the day. This means no shady areas or obstructions blocking those precious rays.
Next, you’ll need to choose the right sized solar panel and battery for your specific needs. Too small and you won’t have enough power, too big and you might end up wasting money on unnecessary equipment. And don’t even get me started on wiring and connections – one wrong move can fry your entire system!
With all that said, if you’re willing to put in the time and effort (and maybe shed a few tears), building your own solar-powered charging station can be an incredibly rewarding experience. Plus, think about all the eco-friendly energy you’ll be using – Mother Nature will thank you!
But wait – before you start ordering parts online like a kid in a candy store, there’s one more thing to consider: cost. Building a DIY solar-powered charging station isn’t necessarily cheap upfront. However, once everything is set up and running smoothly, it could save you money in the long run by reducing your reliance on traditional electricity sources.
Additionally, knowing how to create renewable energy solutions could come in handy during emergencies or natural disasters where access to electricity may be limited. So go ahead and tackle this challenging yet fulfilling project – who knows what other amazing things you’ll discover along the way!
Creating A Solar-Powered Garden Fountain
Gathering the necessary materials for your solar-powered fountain project is the first step. You’ll need a solar panel, fountain pump, and fountain basin. You’ll also need some tools such as a drill, screwdriver, and a few other items.
Next, you’ll need to assemble the fountain. Connect the pump to the solar panel, then assemble the fountain basin and connect it to the pump. Make sure everything is securely fastened and all the wiring is routed properly to avoid any potential hazards.
Finally, you can place the fountain in your garden. Choose an area that receives direct sunlight for the best performance. Once it’s in place, you can enjoy the soothing sounds of the fountain for many years to come.
Gathering Materials
Imagine strolling through your garden, hearing the soothing sound of water trickling down a fountain. Now imagine that same fountain powered completely by solar energy!
To create this eco-friendly addition to your outdoor space, you’ll need to gather some key materials. First and foremost, you’ll need a solar panel and battery system capable of providing enough power for the pump. You’ll also need tubing, a submersible pump, and a container for the water reservoir. Additionally, consider adding decorative elements such as stones or plants around the base of the fountain to enhance its aesthetic appeal.
With these materials in hand, you’re ready to begin building your very own solar-powered garden fountain.
Assembling Fountain
Now that you have all the necessary materials for your solar-powered garden fountain, it’s time to start assembling!
Begin by placing the submersible pump in the water reservoir container and attach tubing from the pump to where the water will flow out of the fountain.
Next, connect the tubing to a nozzle or spout that will create your desired water flow pattern.
Now, it’s time to install your solar panel and battery system.
Place your solar panel in an area with direct sunlight and secure it into place using screws or mounting brackets.
Connect the wiring from the solar panel to the battery system which should be located near the fountain.
Once everything is wired properly, turn on your new eco-friendly garden feature and enjoy its tranquil ambiance day and night without worrying about electricity bills or harmful emissions!
Placing In Garden
Now that you have successfully assembled your solar-powered garden fountain, it’s time to find the perfect spot for it in your yard.
Consider placing it where it can receive plenty of sunlight throughout the day so that the solar panel can effectively charge the battery system.
You may also want to think about how close it is to a water source and whether or not you’ll need an extension cord to connect the pump to electricity.
Once you’ve found the ideal location, sit back and relax as your new eco-friendly feature adds a peaceful ambiance to your outdoor space.
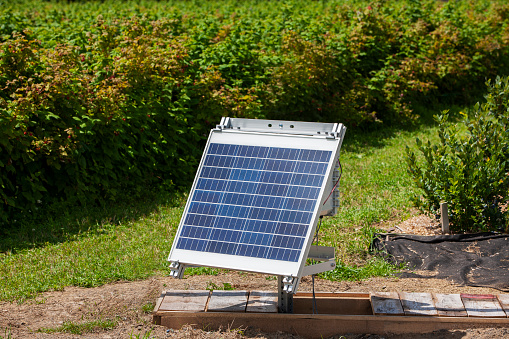
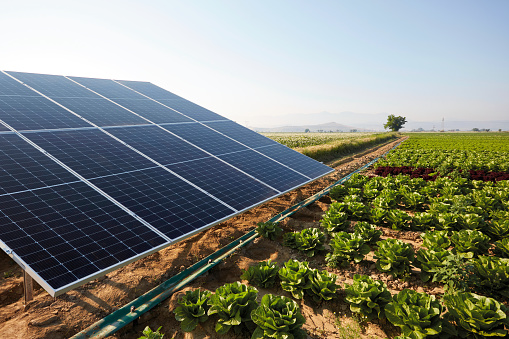
Installing A Solar Panel System For Your Home
After creating a solar-powered garden fountain, you may have realized the potential of utilizing solar energy in your home.
Installing a solar panel system for your home can not only save you money on electricity bills but also reduce your carbon footprint.
To start, research and plan accordingly. Determine how much energy your household consumes each month and calculate how many panels you will need to generate that amount of electricity.
Consider factors such as location, shading, and roof orientation when deciding where to install the panels. It is also important to check with local regulations and utility companies regarding permits and net metering programs.
With proper planning and installation, a solar panel system can provide clean and renewable energy for years to come.
Remember that installing a solar panel system is an investment that requires some upfront costs. However, it is worth considering long-term benefits such as reduced electricity bills and increased property value.
Additionally, there are various DIY kits available online which can make the process more affordable while allowing you to learn about the technology behind it all.
So don’t hesitate to explore the world of solar power – who knows what other amazing projects
