Click Video to Watch
Course Summary: How To Save Energy
The most important thing you need to take away from this lesson is…
How To Save Energy: It is estimated that the average home has enough air leakage that it is equivalent to a three square foot hole in your wall. This results in massive loss of heating and cooling. Doing this one step alone can save you up to 50% of your utility bill.
Like I said in an earlier video, I’m all about 80/20…that is, doing the least work in order to get the biggest return on my time investment. Do this one step and you’ll see a massive improvement on your utility bill.
The next couple lessons will show you how to find air leaks, and make a plan to plug them forever.
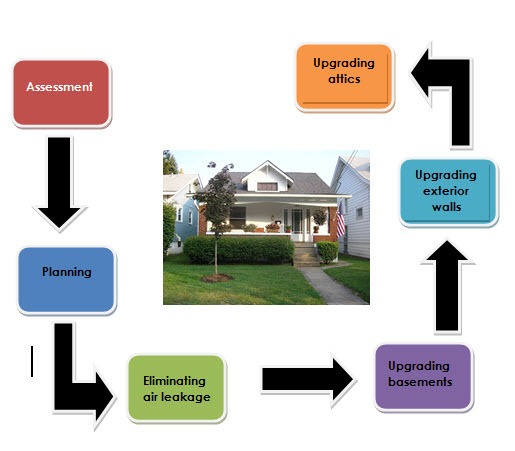
If your home is older than 10 years old, it is likely that energy saving features were not built into its design. Not a problem. There is no reason to tear it down or move. What we can do is review the entire house and systematically introduce energy saving and energy reduction tips to drastically reduce the amount of energy needed to heat and/or cool your house
Over the next few lessons we’ll look at each of these aspects and step-by-step, start turning your home into an energy asset.
Step one: Energy Assessment
You can easily conduct this yourself in a couple of hours. You can, of course, spend a few hundred and hire a professional to do it for you as well. The choice is yours. I’ll assume you’re interested in saving money, doing it yourself and putting that money saved towards other aspects off grid living.
Air Leakage:
Air leakage and getting it under control is the single most important thing you can do when upgrading your home. Controlling air leakage has many benefits…
· Insulation efficiency is increased, and you get full value from the insulation already added to your home.
· Heating/cooling costs can be drastically reduced as the infiltration of hot/cold air is reduced.
· Comfort and overall enjoyment in your house increases as drafts and cold spots are eliminated
· Humidity and condensation levels can be more effectively controlled.
Where to start:
We need to check the general overall condition of the house and test areas that you suspect need more consideration.
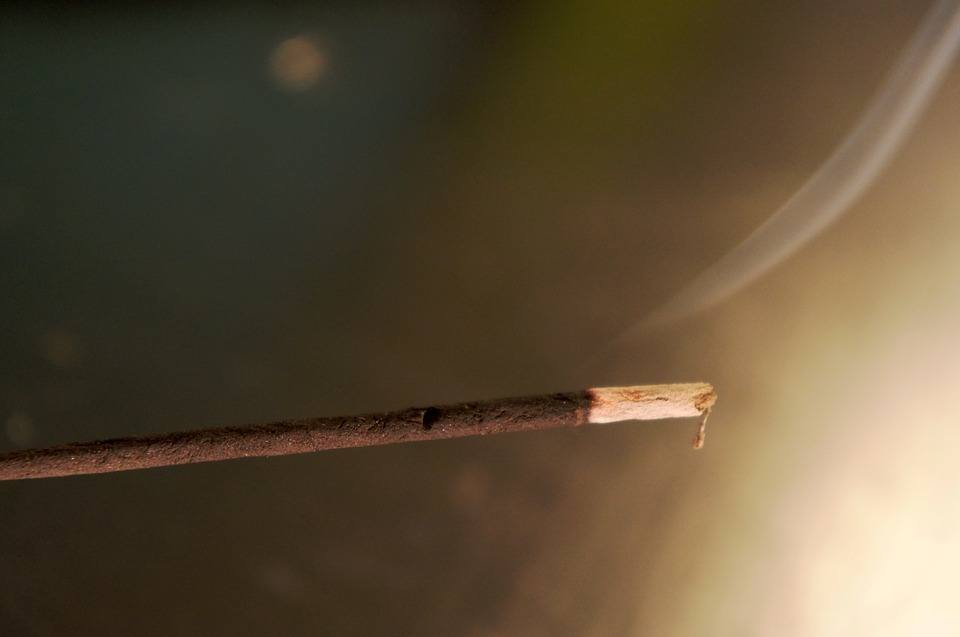
Tools you’ll need:
· An incense stick
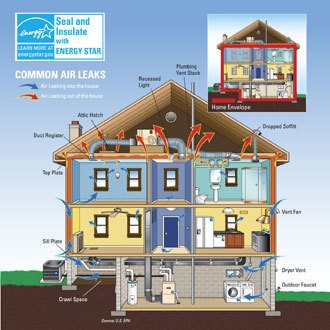
Locating Air Leaks…
It’s said that the average house has enough air leakage to amount to a 3 square foot hole in the wall.
Right now, your heating and/or air conditioning is blasting away at full steam working hard to replace the heating/cooling being lost. This is not exaggeration. Do you see why you’re wasting so much energy? Why your utility bills are so high?
But we are going to find those leaks, plug them, and seal them forever…
· Many older homes treat the basement like an outcast orphan, it’s there, but let’s leave it alone. Too bad because it’s eating incredible amount of energy dollars if left untreated.
· Cavities and spaces between walls in older homes are usually either under insulated or completely uninsulated. If you have a one room in your house that is always colder than all the others, this is usually the reason. You might as well be heating or cooling this room with all the windows open.
· Stone and brick walls look great on the outside however they are probably killing your utility bill if they’re not properly dressed on the inside.
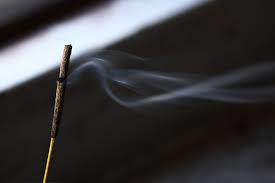
A simple, yet effective method of determining air leaks is to…
Use some sticks of incense. Light them and walk around the house on a windy day is best, but any day will do.

- · Stand in the middle of the room and observe what happens to the smoke.
- It should, in a well-insulated room, rise straight upward. Walk to other parts of the room, test all 4 corners.
- Test near windows.
- If the smoke is drawn towards you, or is blown away this indicates an air leakage path.
- Make a note of where you are in the room when the smoke pattern emerges. Or better, draw a simple square on a piece of paper, marking the locations.
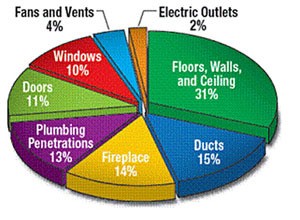
Continue testing in this manner, paying particular attention to…
- Electrical outlets, including sockets, switches and light fixtures.
- Any plumbing penetrations including vent stacks and lines coming in to taps and dishwashers, air conditions, heating vents, etc.
- Floor to ceiling joists or other areas where the structure of the house is coming together.
- Floor to ceiling joists or other areas where the structure of the house is coming together.
- Baseboards, crown moldings and doorway and window moldings.
- Fireplace damper area and/or chimney exit through wall or attic.
- Thoroughly check windows and doors. Test the glass, make sure it snug and tight.
- Check the ventilation openings and/or fittings for appliances. This would include kitchen and bathroom fans, dryer vents, gas stoves, water heaters, etc.
- Any pipes, vents, wiring, or plumbing lines in the basement or attic. If possible move the insulation away from these places as you check.
In any place where you encounter the smoke blowing, make a note on your sketch and assign it a severity rating. In other words, smoke blowing directly towards or away from any hole would also be marked with a 1 thru 10 scale indicating severity.
In many older homes, you can stand in the middle of the room and the smoke will be blowing all over the place. Don’t despair. Just mark all the areas down for now. This way, when the time comes you can tackle the tough, problem areas first, saving the most energy dollars, right off the bat.
Other methods of detecting air leaks include
- Shining flashlight at night over all potential gaps while a partner observes the house from outside. Large cracks will show up as rays of light. Not a good way to detect small cracks.
- Shutting a door or window on a piece of paper. If you can pull the paper out without tearing it, you're losing energy
Use the attached worksheet to help you.
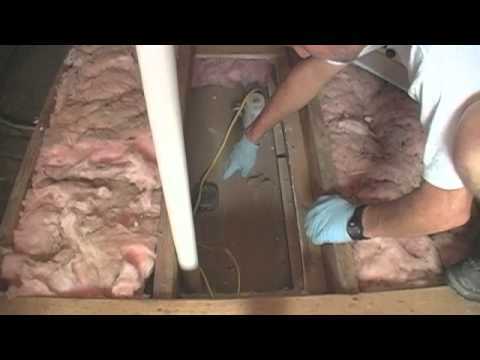
The Basement Check:
An uninsulated basement can account for as much as 35% OF TOTAL HEAT LOSS IN A HOME.
Most people don’t even consider an unfinished basement in terms of heat loss. Most people have the idea that heat only travel upward, and that the earth is a good insulator.
Wrong on both counts.
Heat will travel in any direction it wants, but as a rule of thumb it ALWAYS travels from a warmer area to a colder one. The same with cold air, it always seeks its opposite for balance. To compound the problem, uninsulated floors and walls in these areas act as a heat sink, drawing warm air to these cooler regions.
- · Is the basement ceiling insulated? If not, consider insulating it.
- Check around ceiling penetrations, where the water pipes go upstairs.
- Also check around the joints on your duct system.
To get maximum advantage from any basement upgrade you first should correct any underlying problems. Check your basement for…
- · Accumulates water in the spring or after a heavy rain.
- Dampness, water leaks or puddles after heavy rain.
- Look for any major, or moving cracks in the foundation wall
If you find these problems many times it can be corrected with adding a sump pump.
Many times simple landscaping away from the foundation walls will help.
Consider adding gutters to the house eaves and directing the rain water away from the foundation.
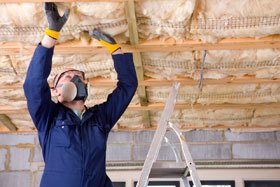
The Attic Check:
Everyone loves to dump their insulation dollars into the attic. Maybe this comes from the mistaken belief that heat rises, therefore, conventional wisdom dictates this MUST be the place to put it. Or maybe it’s because it’s one of the easiest places to insulate. Whatever the reason, just dump a few bags of insulation up there out of the way, and VOILA !!!! Instant 50% savings on the heating/cooling bill.
Sorry. It doesn’t work that way.
The attic does lose heat, no question. But not nearly the heat lose of an uninsulated basement or exterior wall.
In checking the attic the important thing is to make sure all the ceiling penetrations are sealed.
You do this by moving aside the existing insulation to gain access to any problem areas. Yes, of course, ventilation in the attic is important and you shouldn’t be sealing up the vents. These are important to provide summer cooling and winter dryness.
Another potential problem in the attic is moisture, which could come from a number of different places. A leaky roof, ice damming, or even from household vents from the kitchen or bathroom.
Check the attic several times a year, for example, after a heavy rain or on a very cold day. Look for…
- Wet areas
- Mold
- Rot
- Or small drip holes on the insulation, or attic floor surfaces
Spend a weekend doing a systematic check of your home. You’ll now be in a position to know the issues you face, and the best way of dealing with them.
Now that you know the issues, now make a plan to address the challenge. In the nest lesson we'll tackle each issue and solve them. How to save energy continues...
Downloads/Resources (Click to view or right click to download)
Checklists, Cheat sheets,...
Air Sealing Bonus #1,...
Air Sealing Bonus #2,...
Air Sealing Bonus #3,...
